模板插件源码解析
本文以酷大师官方提供的等级为 primary 的模板插件为例,展示:
- 如何编写插件沙盒 JS 代码
- 如何编写插件 UI html 代码
- 如何在插件 UI html 和沙盒 JS 代码之间发送和响应自定义消息
- 如何调用酷大师 Plugin API,生成简单的几何造型
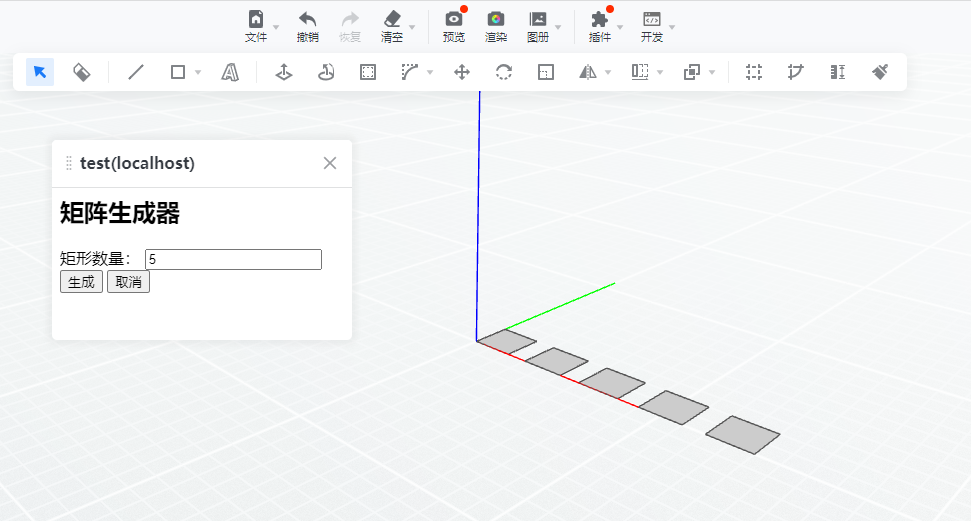
本插件运行起来后如下图示。它会根据用户在 UI 面板上输入的数字,在画布中生成对应数量的矩形。
1、沙盒代码解析
const pluginUI = app.getPluginUI(); // 获得插件沙盒代码操作插件UI的接口对象
pluginUI.resize(300, 200);  // 通过接口对象设置插件UI尺寸为300*200像素
pluginUI.mount();  // 显示插件UI

/* 定义插件UI消息响应函数,用于响应插件UI消息 */
function onUIMessage(data) {
    try {
        if (data.type === 'create-rectangles') { // 判断插件UI发送过来的消息类型
            for (let i = 0; i < data.count; i++) {
                const point1 = GeomLib.createPoint3d(i*1500, 0, 0); // 通过GeomLib.createPoint3d方法创建一个KPoint3d对象
                const point2 = GeomLib.createPoint3d(i*1500+1000, 0, 0);
                const point3 = GeomLib.createPoint3d(i*1500+1000, 1000, 0);
                const point4 = GeomLib.createPoint3d(i*1500, 1000, 0);
                const points = [point1, point2, point3, point4];
                app.getActiveDesign().addEdges(points); // 通过app.activeDesign获得酷大师模型的接口,然后通过调用addEdges方法向酷大师方案中插入edges,被这些edges包围的区域会自动生成面
            }
        }
        closePlugin(); // 关闭插件
    } catch(error) { // 捕获插件运行过程中的异常
        console.error(error); // 输出异常
        closePlugin();  // 关闭插件
    }
}

pluginUI.onMessage(onUIMessage); // 注册消息响应函数到酷大师,用于响应插件UI发送的消息
2、插件UI代码解析
<html>
<meta http-equiv="Content-Type" content="text/html; charset=utf-8" />
<head>
</head>
<body>
    <h2>矩阵生成器</h2>
    <div>
        <label>矩形数量:</label>
        <input type="number" id="count" value="5">
    </div>
    <div>
        <button id="create">生成</button>
        <button id="cancel">取消</button>
    </div>
</body>
<script>
    document.getElementById("create").onclick = () => {
        const textBox = document.getElementById("count");
        const count = parseInt(textBox.value, 10);
        parent.postMessage({ type: 'create-rectangles', count }, '*') // 向沙盒发送消息,消息类型为"create-rectangles"
    }

    document.getElementById("cancel").onclick = () => {
        parent.postMessage({ type: 'cancel' }, '*') // 向沙盒发送消息,消息类型为"cancel"
    }
</script>
</html>